

Did you know most cars need an oil change every three months or 3,000 miles? Doing it yourself can save you money and teach you car care skills. This guide will show you how to change your car’s engine oil at home. You’ll learn from draining the old oil to adding fresh motor oil.
Key Takeaways
- Changing your engine oil can save you money compared to taking your car to a shop.
- Following a step-by-step guide can help you learn valuable DIY car maintenance skills.
- Properly disposing of used oil and filters is important for the environment.
- Regularly changing your engine oil helps extend the life of your vehicle.
- Synthetic oil may allow you to go longer between oil changes than conventional oil.
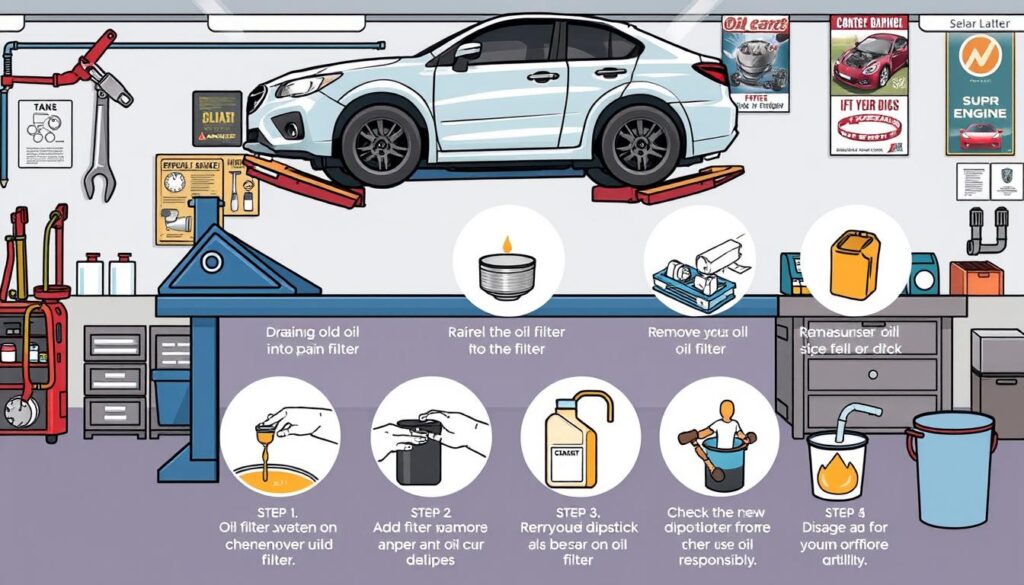
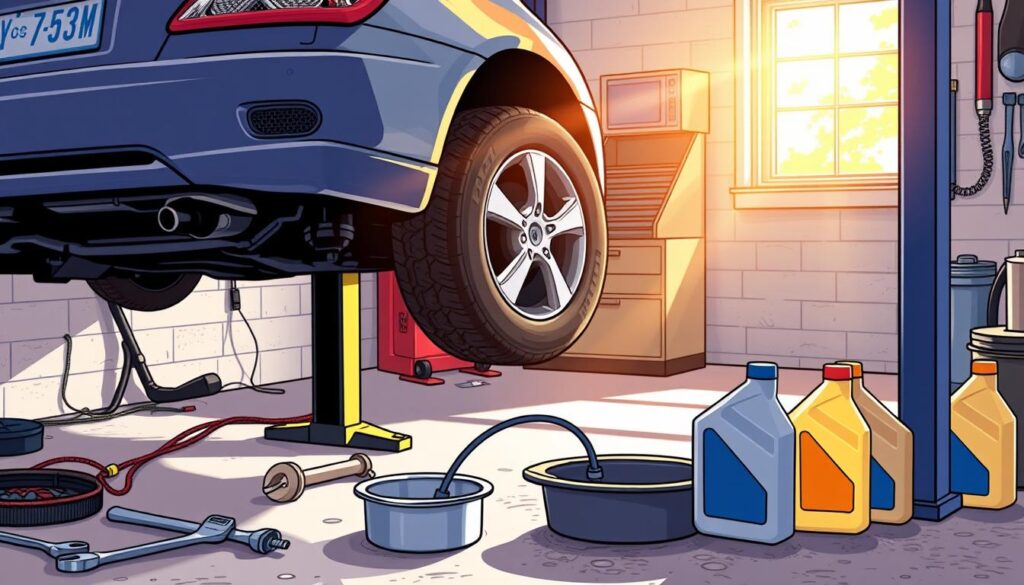
Preparing for the Oil Change
Before starting your DIY oil change, ensure you have everything you need. This includes a new oil filter, fresh motor oil, a drain pan, and a socket wrench. Having these items ready will make the process smoother and avoid any delays.
Next, warm up the engine. Running it for a few minutes thins the old oil, making it easier to drain. This is an important step to ensure the oil flows well during the change.
Finally, park your car on a level surface and apply the parking brake. This not only keeps you safe but also helps the oil drain evenly. It prevents any issues with incomplete drainage.
- Gather the necessary automotive DIY project tools and supplies, including a new oil filter, fresh motor oil, a drain pan, and a socket wrench.
- Warm up the engine by running it for a few minutes to help thin out the vehicle service steps’ old oil.
- Park your vehicle on a level surface and engage the parking brake to ensure safety and proper oil change instructions for oil drainage.
By following these steps, you’re ready for a successful oil change. The next part will show you how to drain the old oil.
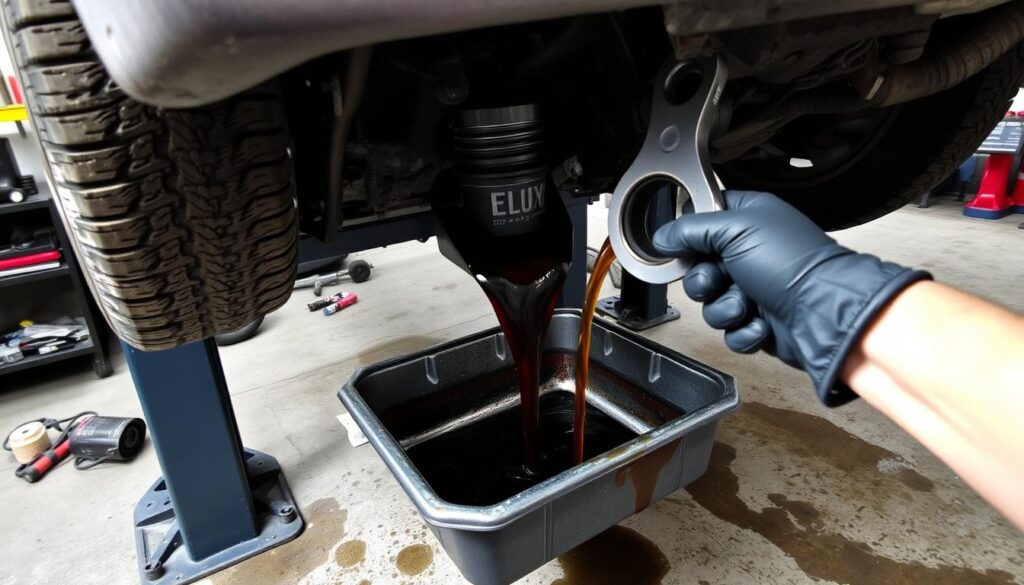
Draining the Old Oil
The first step in changing your car’s engine oil is to drain the old, used oil. This is a crucial step to ensure your engine gets a fresh start with new, clean oil. Here’s how to properly drain the old oil from your vehicle:
Locate the Oil Drain Plug
The oil drain plug is at the bottom of the oil pan. This is the large metal container that holds the engine oil. You’ll need to get underneath the car to access it.
Position the Drain Pan
Place a large drain pan or container underneath the oil drain plug. This will catch the old oil as it drains out. Make sure the pan is directly under the plug to avoid spills.
Remove the Oil Filler Cap
Next, remove the oil filler cap at the top of the engine. This will help the old oil drain out more quickly and completely.
Using a socket wrench, loosen the drain plug by turning it counterclockwise. Once it’s loose, you can remove it by hand. Let the old oil fully drain out, which may take several minutes. When the flow of oil has stopped, replace the drain plug by tightening it back up clockwise.
Be sure to dispose of the used oil properly. It can harm the environment if not handled correctly. Most auto parts stores or recycling centres will accept old motor oil for proper disposal or recycling.
Removing the Old Oil Filter
To put in a new oil filter, you must first take out the old one. First, find the oil filter. It’s usually under the car, near the oil drain plug. Then, use an oil filter wrench to loosen and remove the old filter.
When you take off the old filter, oil might spill out. This is normal. So, have a drain pan ready to catch any spills. It’s also key to dispose of the used oil filter correctly for the environment.
Locate the Oil Filter
The oil filter is easy to find. It’s near the oil drain plug, making it accessible from underneath the car. Look around the engine to spot it quickly.
Unscrew the Old Filter
After finding the oil filter, use an oil filter wrench to loosen and unscrew it. The wrench helps grip the filter to remove it from the engine. Be ready for some oil to spill out, so have a drain pan ready.
Remember to dispose of the used oil filter properly. It can harm the environment. Check with your local recycling centre or auto parts store for the best disposal method.
Installing the New Oil Filter
Replacing the oil filter is key in any what are the 10 steps to an oil change? Or what is a basic oil change? Routine. Before putting in the new filter, make sure the gasket is ready. This ensures a tight and leak-free seal.
Prepare the New Filter Gasket
Begin by lightly coating the gasket of the new oil filter with fresh motor oil. This helps the gasket seal tightly against the engine block, stopping leaks. Make sure to cover the whole gasket surface with oil.
Tighten the New Filter
After preparing the gasket, screw on the new filter by hand until it’s snug. Don’t over-tighten, as this can harm the gasket and cause leaks. Tighten the filter another three-quarter to one full turn after it’s in place.
Installing the new oil filter right is vital for how long does a diy oil change take? And keeping your engine safe. Taking the time to prepare the gasket and tighten the filter correctly can prevent future problems and engine damage.
“Regularly replacing the oil filter is just as important as changing the oil itself. A properly installed filter ensures your engine receives the maximum protection against wear and tear.”
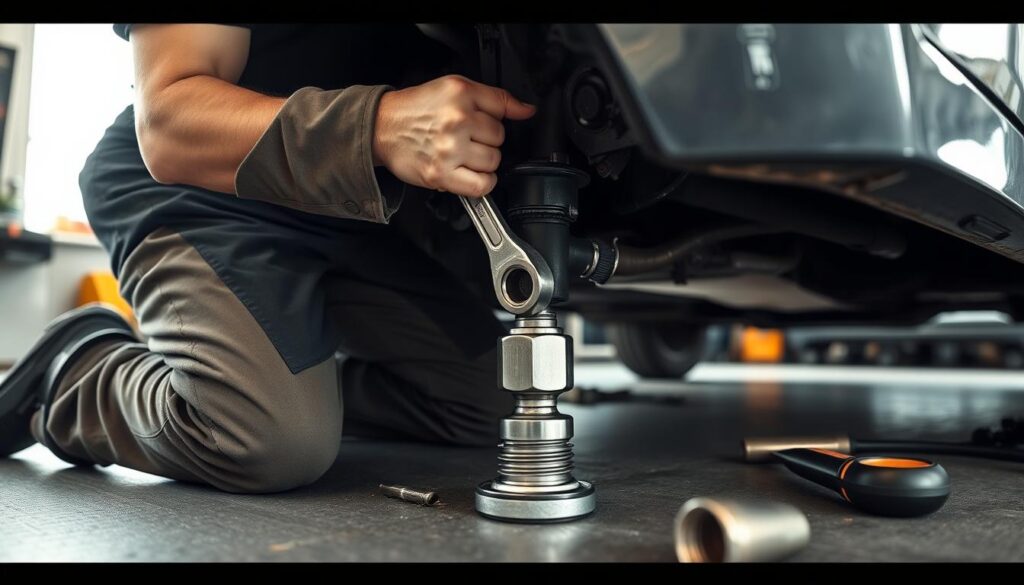
Replacing the Oil Drain Plug
After the old oil drains, it’s time to put in a new oil drain plug. First, clean the threads of the plug for a tight seal. Also, check the sealing washer and replace it if needed. Then, screw the plug back into the oil pan and tighten it well with a socket wrench.
It’s key to install the plug right to avoid leaks or oil loss. Tighten it firmly but don’t overdo it. Over-tightening can harm the threads or the plug. With the plug-in, you’re ready to add fresh oil to the engine.
Remember, how to refill the oil in the car and how to check the oil level are crucial steps. Making sure the drain plug is tight helps prevent spills and future problems.
By following these steps, you can finish the oil change and keep your engine running smoothly. Next, we’ll talk about adding fresh oil to the engine.
Refilling with Fresh Oil
Changing your car’s engine oil is key to keeping it running well. After draining the old oil, it’s time to add fresh, clean motor oil. This guide will help you pour in new motor oil and check the oil level. This ensures your car is ready to go.
Pour in New Motor Oil
Use a funnel to pour the right amount of new motor oil into the engine. Check your owner’s manual for the correct oil type and quantity. Most cars need 4.1 to 4.5 quarts, depending on the engine size.
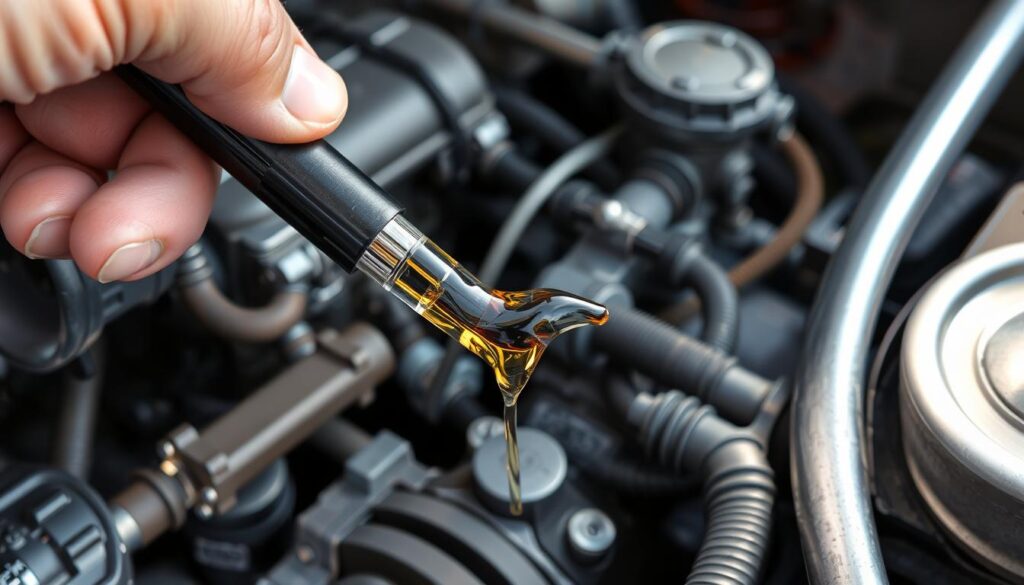
Check the Oil Level with a Dipstick
Start the engine and let it run for 30 seconds after adding oil. This lets the oil spread through the engine. Then, use the dipstick to check the oil level. Add more oil if needed, until it reaches the “full” mark.
Regularly changing your engine oil and keeping it at the right level is vital. It keeps your car running well and lasts longer. By following these steps, you can do a DIY oil change easily and keep your vehicle in top shape.
10 steps to change engine oil, DIY oil change kit, car step-by-step, change oil fil
Changing your car’s oil yourself can save money and teach you about car care. This 10-step guide will help you do it right. It covers everything from getting ready to adding new oil. Follow these steps to do a DIY oil change easily and affordably.
- First, get all the tools and supplies you need. This includes a drain pan, oil filter wrench, new oil filter, and the right motor oil for your car.
- Next, park your car on a flat surface and apply the parking brake. Start the engine and let it warm up for a few minutes. This makes the oil easier to drain.
- Find the oil drain plug at the bottom of the oil pan. Put the drain pan under it. Then, unscrew the plug and let the old oil drain out completely.
- After the oil drains, put the drain plug back and tighten it well.
- Now, find the oil filter. It’s usually on top or the side of the engine. Use the oil filter wrench to loosen and remove it.
- Put a thin layer of new oil on the gasket of the new oil filter. Then, screw it on by hand until it’s tight.
- Open the oil filler cap and add the right amount of new motor oil. Check your owner’s manual for the correct amount.
- Put the oil filler cap back on and use the dipstick to check the oil level. It should be just right.
- Start the engine and let it run for about 5 minutes. Then, check for leaks around the oil filter and drain plug.
- Finally, dispose of the used oil and filter properly. Follow local environmental rules for this.
By following these 10 steps to change engine oil, you can do a successful DIY oil change. This keeps your car’s engine running well. Always check your owner’s manual for specific advice on oil changes for your car.
Starting the Engine
Now that you’ve added fresh oil and installed the oil filter, it’s time to start your car. This step is key to making sure the oil spreads out evenly. It helps keep the engine’s parts well-lubricated.
Run the Engine for 5 Minutes
Start the engine and let it run for about 5 minutes. This short time lets the oil reach every part of the engine. Most cars need 5 to 8 quarts of oil for a full oil change. Draining the old oil and replacing the filter usually takes 30 minutes to an hour.
Check for Leaks
While the engine is running, check the oil drain plug and the new oil filter for leaks. Make sure the oil filter is tightened by hand to avoid leaks. But, it’s crucial to check for any drips or seepage. If you see any leaks, turn off the engine right away and tighten the part.
Let the car sit for 5 to 10 minutes after adding new oil. This lets it settle before checking the oil level with the dipstick. Also, don’t over-tighten the oil drain plug to avoid damage.
With the engine running and the oil change done, you’re almost ready for a smooth drive. Always check your car’s manual or online guides for specific tips for your car.
Disposing of Used Oil and Filter
After you’ve done your DIY oil change, it’s key to dispose of the used oil and filter right. This not only protects the environment but also follows local laws. Here’s how to safely and eco-friendly get rid of your used car fluids and parts.
Proper Disposal Methods
After draining the old oil, put it in sealed containers. Many auto stores, repair shops, and car fan sites take used oil and filters for recycling. Look up the closest oil recycling spot in your area with your local authorities.
Used oil filters need to drain for at least 24 hours before you throw them away. This makes sure the oil doesn’t spill and harm the environment. After draining, you can dispose of the old filter through your local vehicle service manual or preventive maintenance checklist program.
Properly getting rid of used oil and filters is good for the planet. It stops soil and groundwater pollution. By following these easy steps, you help make your community and the world a cleaner place.
“Improper disposal of used oil and filters can have devastating consequences for the environment. Doing your part to recycle and dispose of these materials responsibly is crucial.”
Benefits of DIY Oil Change
Doing a DIY oil change on your car has many perks. It saves you money and lets you learn a new skill. Changing your oil yourself can be both fun and useful.
Cost Savings
One big plus of a DIY oil change is the money you save. Oil changes at shops cost between $20 and $100. This depends on your car, the oil type, and extra services. Doing it yourself can save you a lot, especially if you change oil regularly.
Learning a New Skill
Changing your engine oil yourself is rewarding. It teaches you a new automotive maintenance skill. With a step-by-step guide, you learn about your engine’s lubrication system. This knowledge helps with future car repairs and upkeep.
“Performing your own oil change can be a cost-effective and educational experience, allowing you to take an active role in maintaining the health of your vehicle.”
In summary, a DIY oil change offers more than just saving money. It lets you learn a new skill, understand your car better, and keep your engine running longer with proper care.
Determining Oil Change Frequency
When thinking about how often you should change your motor oil, the old rule of every 3,000 miles is outdated. Modern engines and oils can last up to 5,000 miles or more. The best way to find out when to change your oil is to check your owner’s manual.
Your car’s maker has designed the engine and picked the best oil change time. They consider the oil type, driving conditions, and engine design. Following their advice helps keep your engine running well.
Most cars can go from 5,000 to 10,000 miles before needing an oil change. Some models might even go up to 15,000 miles. But, always check your oil level and condition and don’t just look at the mileage.
Driving in harsh conditions, towing often, or idling a lot can mean you need to change your oil more. If your oil looks dark and dirty, or if your car’s oil change light comes on, it’s time for a change, no matter the mileage.
Keeping up with your car’s oil change schedule is key for a healthy engine. By following the manufacturer’s advice and watching your oil, your car will run great for many years.
Conclusion
By following the 10 steps in this guide, you can do a DIY oil change on your car. You’ll save money, learn new skills, and feel proud of taking care of your car yourself. Always put safety first and use the right 10 steps to change engine oil, DIY oil change kit, car step-by-step, and change oil fil.
Proper disposal of used oil and filters protects the environment. Follow local rules and find responsible recycling places. With some patience and care, you can keep your car running well and save money, too.
This guide is for both seasoned DIY fans and beginners in auto care. It gives you the tools and advice to do a car step-by-step oil change confidently. Learning this skill is rewarding and shows you can take care of your vehicle on your own.
FAQ
What are the 10 steps to change engine oil?
To change your car’s engine oil at home, follow these 10 steps: 1) Gather tools and supplies, 2) Warm up the engine, 3) Park on a level surface, 4) Remove the oil drain plug, 5) Unscrew the old oil filter, 6) Install a new oil filter, 7) Replace the oil drain plug, 8) Add fresh motor oil, 9) Start the engine and check for leaks, and 10) Dispose of used oil and filter properly.
What tools and supplies do I need for a DIY oil change?
You’ll need a new oil filter, fresh motor oil, a drain pan, a socket wrench, an oil filter wrench, and a funnel for a DIY oil change.
How do I locate and remove the oil drain plug?
The oil drain plug is at the oil pan’s bottom. Place a drain pan underneath. Use a socket wrench to loosen the plug. Then, remove it by hand to drain the old oil.
Where is the oil filter located, and how do I remove it?
The oil filter is under the vehicle. Use an oil filter wrench to loosen and unscrew it. Be ready for oil spillage when removing it.
How do I properly install the new oil filter?
Coat the new oil filter’s gasket with oil for a good seal. Screw it on by hand until snug. Avoid over-tightening.
How much new motor oil do I need to add, and how do I check the level?
Check your owner’s manual for the correct oil type and amount. Pour the recommended oil through the fill cap. Use the dipstick to check the level and add more if needed.
How do I properly dispose of the used oil and filter?
Many auto parts stores and service centres recycle used motor oil and filters. Check with your local authorities to find the nearest recycling facility.
What are the benefits of doing a DIY oil change?
DIY oil changes save money compared to professional services. They also help you learn about your vehicle, improving your understanding of its mechanics.
How often should I change my engine oil?
Oil changes are recommended every 3,000 miles, but modern engines may go 5,000 miles or more. Check your owner’s manual for the best interval for your vehicle.